Tuesday, July 14, 2009

A Country Wedding

Daisy wedding bouquet

I can just imagine my grandparent’s wedding, during the Second World War, in a little village named Bargemon, somewhere in Provence. Nothing was really glamorous or fancy back in 1943. People were simply using what they were able to grow and harvest. At that time, every family, rich or poor, had a little piece of land outside the village where they would grow fruits and vegetables, as well as keep some rabbits and chickens. They would call that land La campagne (The country house). This country house could be very modest, sometimes just a shack.

My family had one for many generations, a nice piece of land with over 80 olive trees and enough space to growth all kind of produce to feed all the family. My grandfather was in charge of it. Every day, he would go to take care of his crops and water my grandmother's flowers. During the summer, all the family would gather there for long family dinners and enjoy the bounty produced by the land and my grandfather's hard work. My parents are now in charge of the country house and keep the tradition alive by producing their own olive oil.

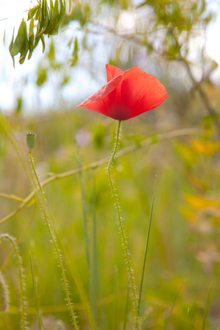
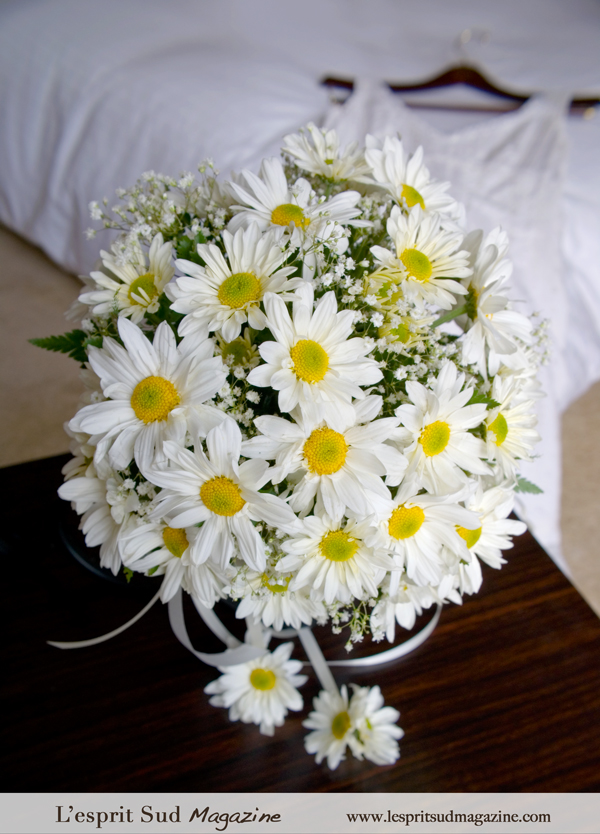
Flowers have always been a part of the landscape. Marguerites, as we call the daisies, are pretty abundant in the fields during the summer. Their white color and simplicity makes them a good candidate for a country wedding theme. Even if I do not have any pictures of my grandparents wedding, I can image my grandmother carrying a simple daisy bouquet down the chapel of Notre Dame de Montaigu.

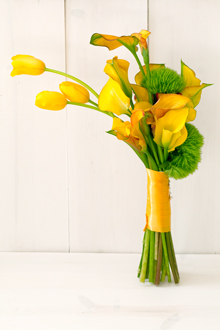
I had my grandmother in mind when designing this nosegay bridal bouquet using simple daisies. Even if today’s trend in wedding flowers is more toward sophistication, this monochrome bouquet can certainly make nice statement for a wedding with a country flair.

Round Nosegay wedding bouquet

Daisy wedding Bouquet

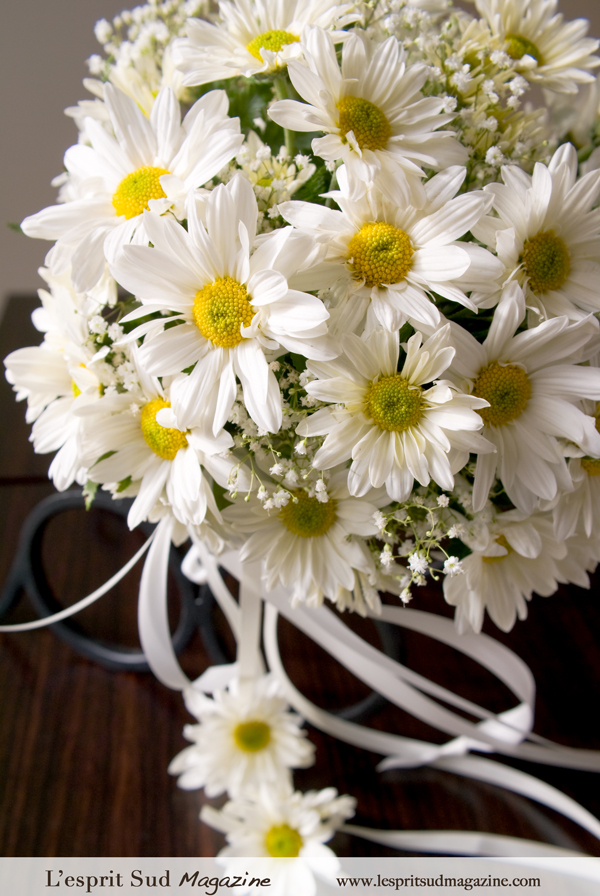
Nosegay Wedding Bouquet

1 wedding bouquet holder (BHO)

1 bunch of daisy poms (4 – 5 stems)

1 stem of baby’s breath

1 stem of plumosa

4 stems of leather fern

1 stem of lemon leaf* (6-9 leaves)

4 yards of satin ribbons

1 wire

1 wooden pick

Floral adhesive

* Laurel leaves can work too


1) Glue the lemon leaves on the solid base of the BHO using the floral Oasis. Wait a little bit to make sure the leaves are really secured before starting to design.

2) Wrap the Oasis with a piece of plumosa and add other pieces in the center part.

3) Place small pieces of leather fern on the top of the lemon leaves, and then add other pieces in the center to create a web and cover the mechanic. Make sure however that they are not too packed to leave enough room to place the flower stems.

4) Place the daisies in a traditional round arrangement where the first 13 flowers are creating the framework. Then add the other ones in empty spots, working side-to-side and top to bottom. The stem length is about 4 ½” and each stem will go half the way in the Oasis. Take the bouquet in your hand to have the bride perspective. Also, see it in a mirror from a distance to see proportion and potential holes.

5) Finish the arrangement with the baby’s breath.

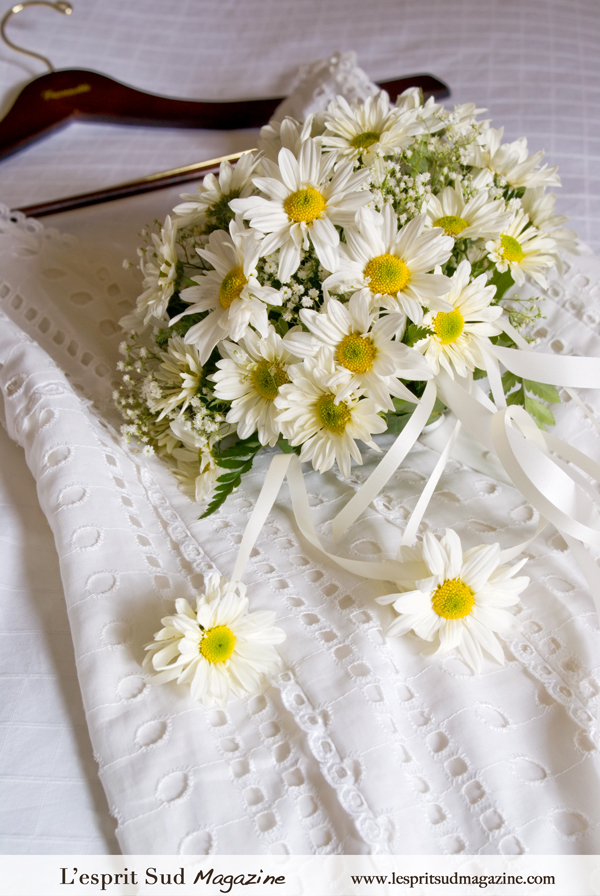
6) Using the ribbons, create different lengths and secure it with a wire. Attach the ribbons to a small wooden pick and place it on the bottom part of the bouquet. You can add a final touch by making a knot to each ribbon end, or gluing a daisy or also attaching a little piece of baby’s breath.


Note: This bouquet is made with a BHO, which replace the traditional handed-tied bouquet. Because it requires a lot less flowers, this type of technique is a good option for the savvy bride.


Thursday, July 9, 2009

Verrine: Deconstruction in a glass

Cherry mousse verrine

What about some change in your dessert presentation? Nothing is easier and more exotic than presenting your dessert in verrines. But what is a verrine exactly? A verrine is an appetizer or dessert that consists of a number of components layered artfully in a small glass. In France, we have been using verrines for quite some time (Should I mention Pierre Hermé?). That’s actually where the word comes from, referring to the glass itself. So, are you ready for some excitement in your kitchen?

The nice part of creating verrines lies in the layering of different textures, colors and of course flavors, creating endless possibilities. Also, the dessert you usually enjoy can be artfully crafted and repackaged in these little glasses. And last but not the least, verrines will help you to control portions by controlling how much food goes in each serving. You and your guests will never have to have to feel guilty anymore for ending your meal with a sweet note.

Cherry mousse verrines

Most of the dessert presented in a verrine won’t require any cooking in the glass itself. This means that you do not need to shop for any particular vessel, which can be quite expansive. You can simply use regular glasses that have an interesting and “easy to handle” shape. Et voila, you are good to go…

The recipe featured in this article is an adaptation of one published in the French magazine: Elle a Table. The dessert is very light since it requires no butter or eggs. It uses semolina flour to elaborate the mousse, which create a very delicate texture that we infuse with orange blossom water. Let the verrines rest overnight in the fridge and add a scoop of whipped cream and some crushed pistachios…. then you will have a fresh taste of heaven in the middle of your summer.

Cherry mousse verrine


Cherry mousse verrines
(Recipes for 4 servings)

4 Verrines
9 oz (250g) of cherries
¾ cup (150g) of sugar
1 tbsp of lemon juice
2/5 cup (100ml) of water
4 tbsp (40g) of fine semolina flour
2 cups (500ml) of whole milk
1 ½ tbsp of orange blossom water*
½ cup (120g) of heavy cream
1 tbsp of powdered sugar
¼ cup of crushed pistachios

* Can be replaced with rum or vanilla extract


Wash your cherries and remove stems and pits. Place them in a small saucepan with the water, the lemon juice and 4 tbsp of sugar. Let them cook at medium-high temperature for about 20 minutes or until they get nicely soft and produce a syrup. Let them cool off for about 1 hour.

In another medium saucepan, warm the milk over medium heat. When the milk is about to boil, add the semolina flour whisking continuously until the mix become very smooth. Add ½ cup of sugar and continue to whisk until smooth and thickened. Remove from the heat whisk in the orange blossom water. Let it cool off for about 1 hour. 

Assemble the verrines
Place the cherries and some syrup on the bottom of each verrine. Drop 3 tbsp of the milk and semolina mixture on the top of the cherries. Place the verrines in the fridge for at least 3 hours, overnight would be ideal. Before serving, add a tablespoon of whipped cream (heavy cream mixed with powdered sugar) and some crushed pistachios. And to finish, place a nice Cherry on the top.


Note: You can substitute the cherries with other fruits like blackberries, raspberries, strawberries or peaches. You will just need to adjust the cooking time to 3-4 minutes, until the fruits get soft but not completely broken down.


Wednesday, July 1, 2009

Pine nuts tart, Michelin Star rated

Patisseries from L'Oasis Mandelieu La Napoule

Most oases are composed of lush greenery and flowers, but some are also made of divine sugar. This is the case of the Oasis Shop, the fine patisserie boutique of the 2 Michelin stars restaurant: L’Oasis in Mandelieu-La-Napoule, 20 minutes away from Cannes. The restaurant is owned and operated by 3 brothers who also happen to be 3 chefs: Stéphane, Antoine and François Raimbault, the later being the Pastry Chef.

My parents used to live at a walking distance from l’Oasis. My dad will go at least once a week with our dashund Maximus, at their boutique to buy some croissants, pains aux chocolats and some fine patisseries. Everything there is just pure délice for the eyes and the palate. Thank god I was living in Canada at that time, or I would have end-up looking like the Michelin guy -)


Patisseries - La Tarte aux pignons (Pine nut pie)


One of the specialty dessert of l’Oasis is “La Tarte aux Pignons” (The pine nut tart). This tart is a typical Provencal tart. Indeed, it very common for Provencal dishes to use pine nuts since the pine trees that produce them are indigenous from this region. I remember as a kid, my cousin and I used to love cracking the big pinecones to extract the precious seed. It was a tremendous job, but what a great reward when that nut was finally melting in our mouth.

Chef François Raimbault was a guest of a French TV show in January 2009 and explained how to make this famous pie. I took a chance and baked one. Although the recipe did required some time, the result was amazing. I baked a big pie as well as some tartelettes (Mini pies). We just loved it.


Patisseries - La Tarte aux pignons (Pine nut pie)


Pine nut pie from L'Oasis
(Recipe for 6-8 servings)

Pastry (Pâte sablée)
½ cup (113g) of soften butter
1/3 teaspoon (2g) of salt
2/3 cup (165g) of powdered sugar
1/1 cup (50g) of finely ground almond
½ teaspoon of vanilla extract
1 egg
1 ½ cup (200g) of flour*

Custard (Crème brulée)
½ cup (100ml) of milk
1 vanilla bean
1 cup (250g) of heavy cream
3 egg yolks
¼ cup (50g) of granulated sugar
1/6 cup (40g) of orange flower water

Pine nut topping
1/5 cup (90g) of granulated sugar
1/3 cup (90g) of water
2 cups (275g) of pine nuts
1 tablespoon of powdered sugar
* May need more flour to achieve the desired consistency


Preparing and blind baking the pastry
Mix all together the butter, grounded almond, powdered sugar, vanilla extract and salt until well combined. Add the egg, then the flour. Do not overwork the dough or it will become too “elastic”. Let it rest in the fridge for 1 hour.

Roll the pastry dough to fit a 10” (26cm) pie tin. Roll the pastry out between 2 sheets of non-stick baking paper, rolling from center out and turning it to ensure even rolling. Peel off one sheet of baking paper and line the pie tin pastry-side down. Pell off the remaining piece of paper and gently lift and tuck the pastry, trying not to stretch it, into the tin. Trim the edges. Put in the freezer for 2 hours.

Blind baking is a technique where the pastry shell is partially baked without the filling. Line the base with non-stick baking paper and fill with uncooked rice or dried beans and bake for 15 minutes at 390˚F (200˚C). Remove the paper and weight and let rest.


Preparing and cooking the custard
Boil the milk and heavy cream with the vanilla bean sliced in two. Let infuse for ½ hour then let it cool down. Mix the egg yolks and sugar for 2-3 minutes. Strain the cold milk over the egg yolk and sugar mixture. Add the orange flower water last. Pour the mixture on the blind baked pastry shell and bake for 20 minutes (up to 30 minutes) at 230˚F (110˚c).


Preparing the pine nuts topping
Place water and granulated sugar in a saucepan over medium heat. Once the temperature hits 240˚F (116˚C), stir in the pine nuts. Let them cool off on a baking sheet or a marble board. Once cold, place them on the top of the cooked tart and dust with the powdered sugar. Refrigerate overnight.


Patisseries


For more information

If you visit the French Riviera, le Restaurant Oasis is definitively worth a visit.
Rue Jean-Honoré-Carle
06210 LA NAPOULE
FRANCE
+33 (0) 4 93 49 95 52
Website