Monday, December 31, 2012

Elegant Holidays Design - {White and Green}

Elegant Holiday Design

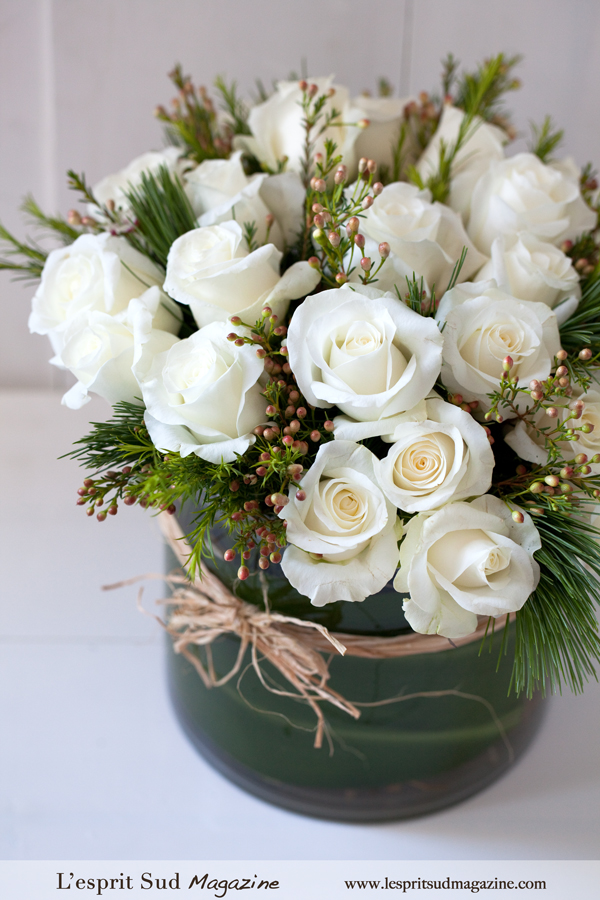
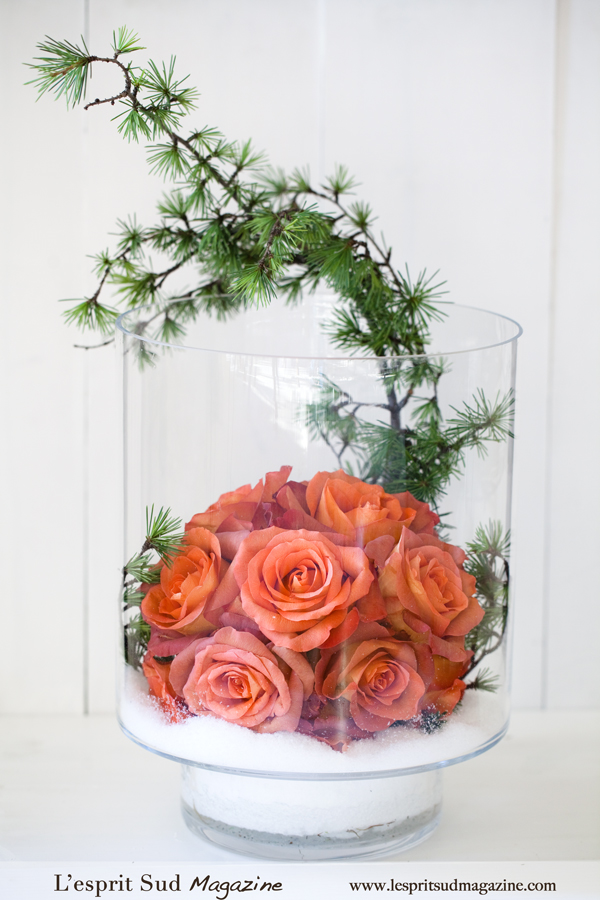
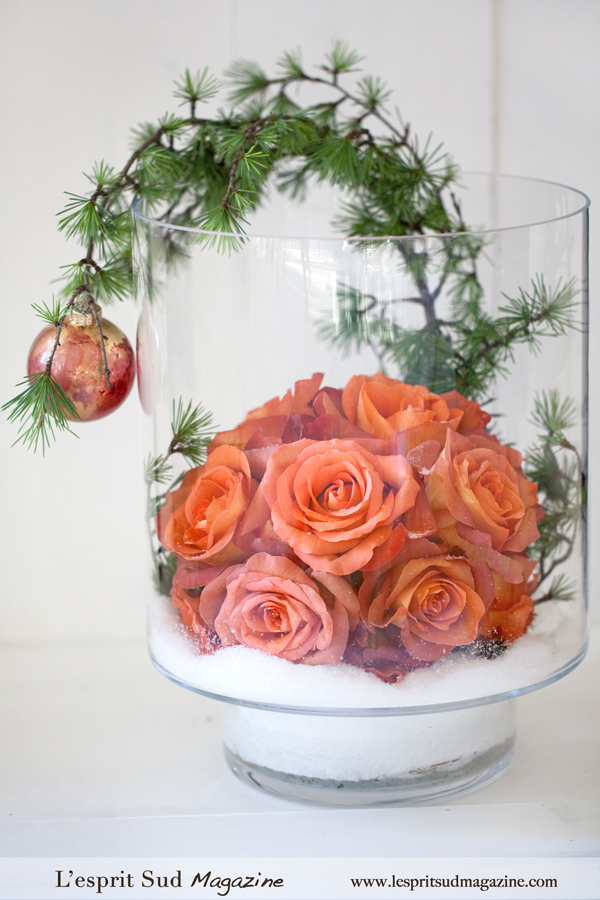
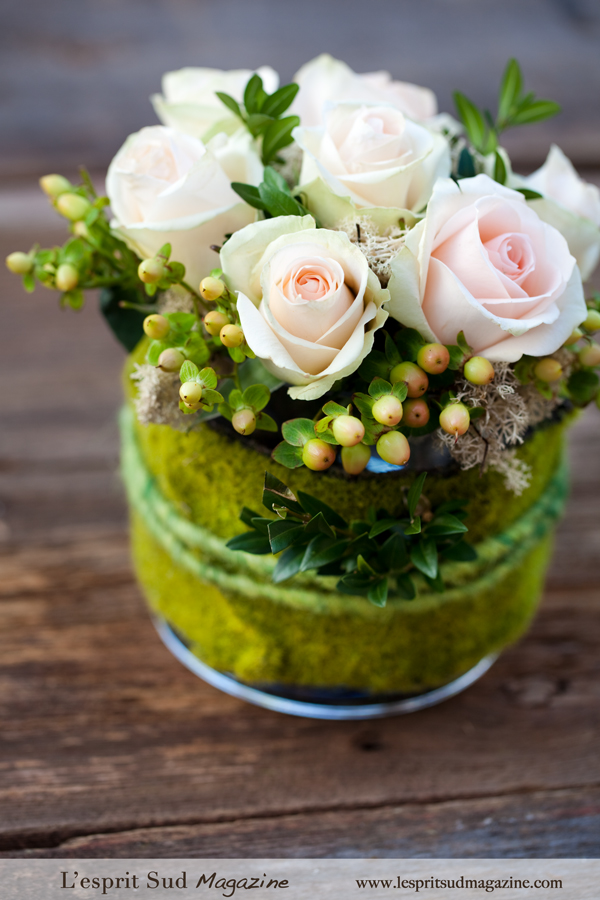
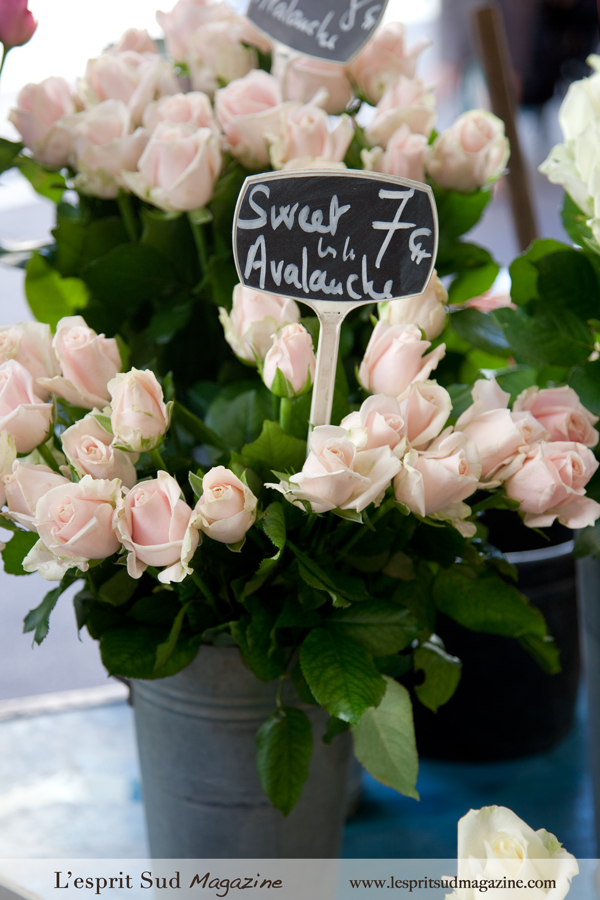
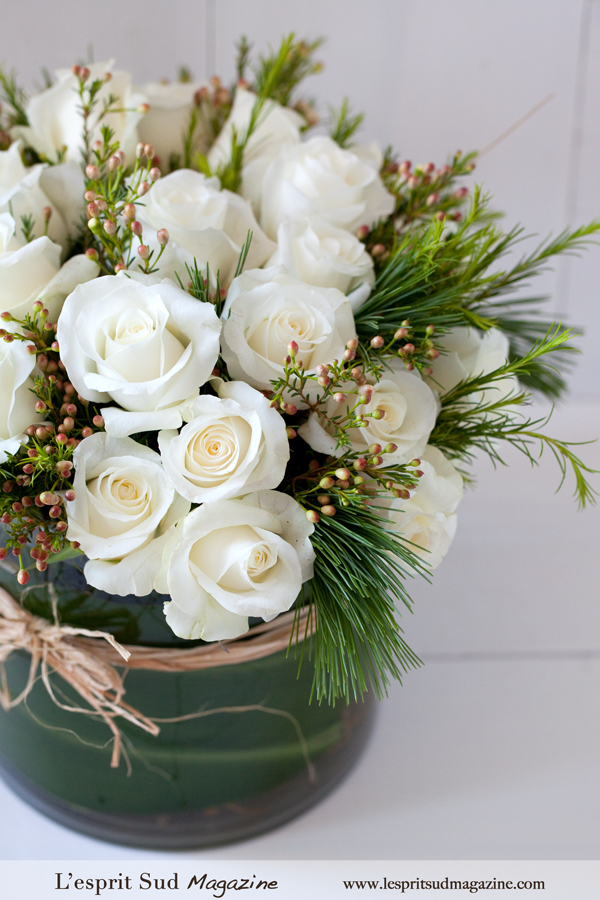
Today is the last day of the year... I can't believe that 2012 is already gone. I went to the flower market this morning and found some beautiful Akito roses that I used last year to create a Japanese Christmas design. I also bough some princess pine, so elegant to me. With a bunch of 25 roses, I had enough to create 2 simples, but elegant arrangements to celebrate the New Year's Eve.

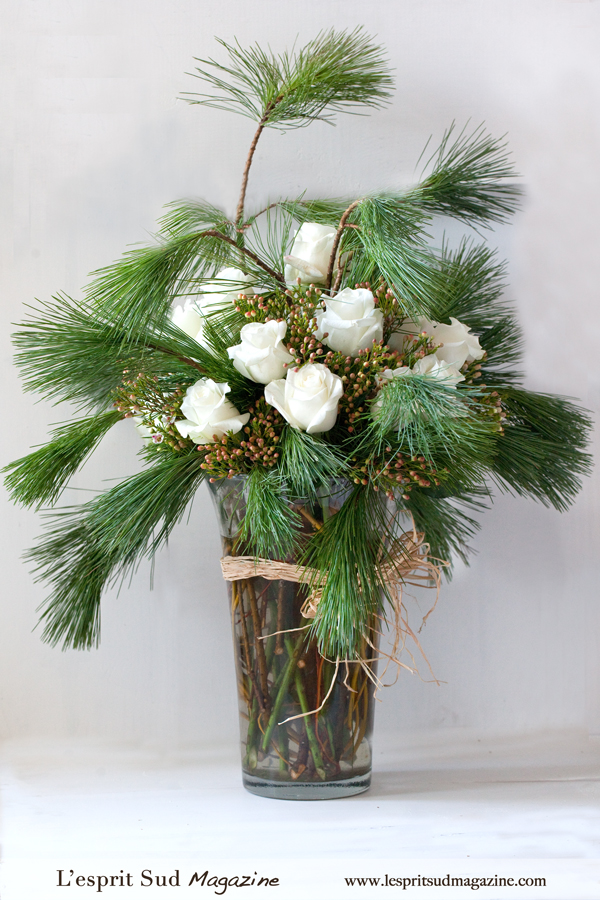
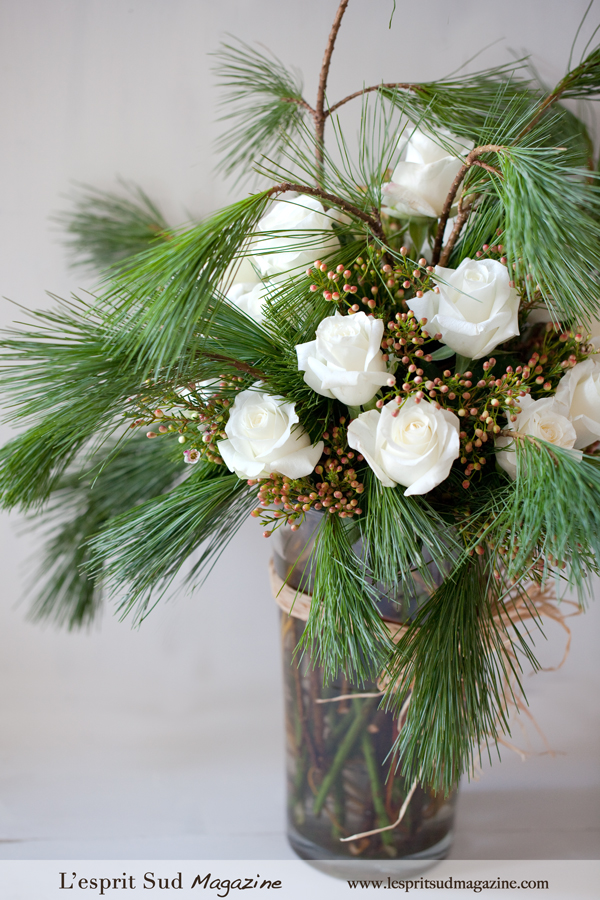
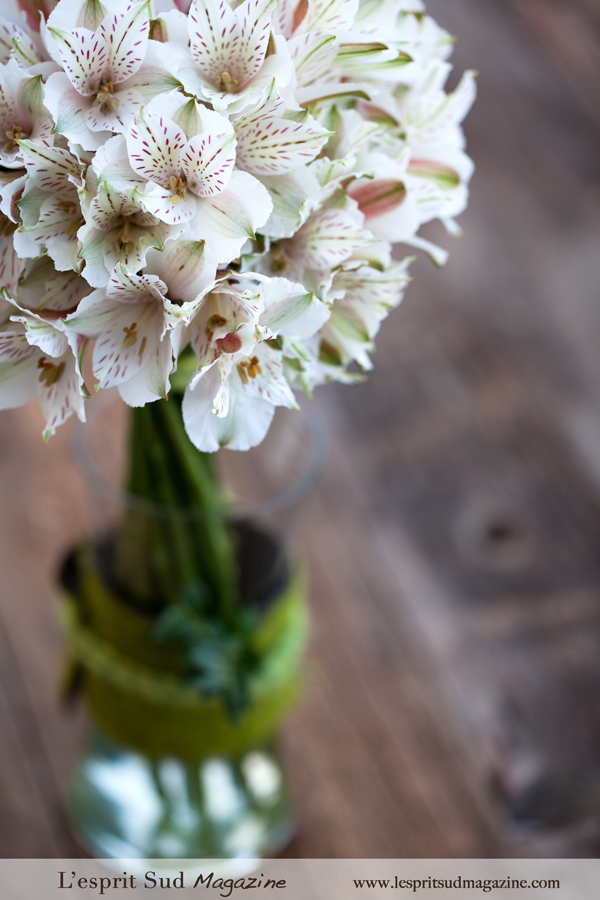
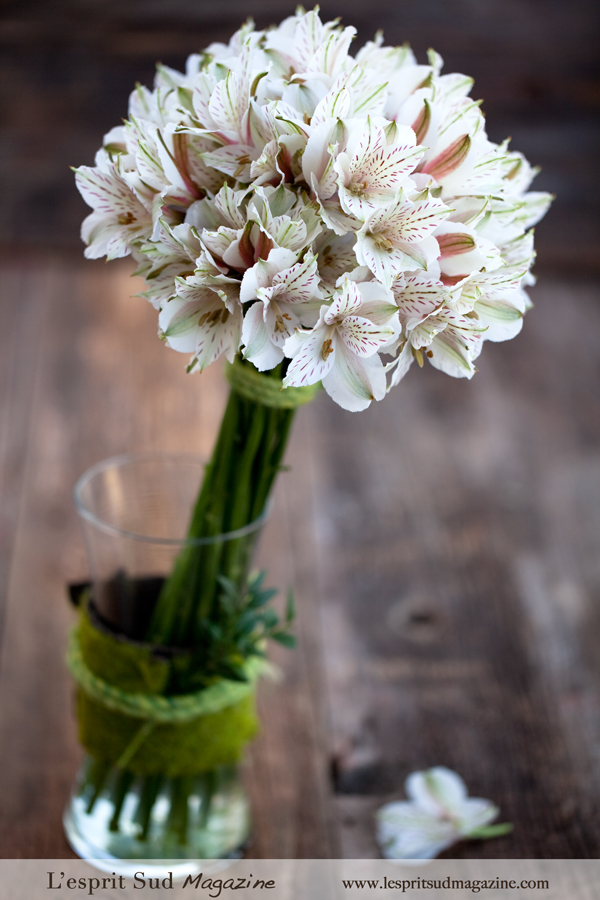
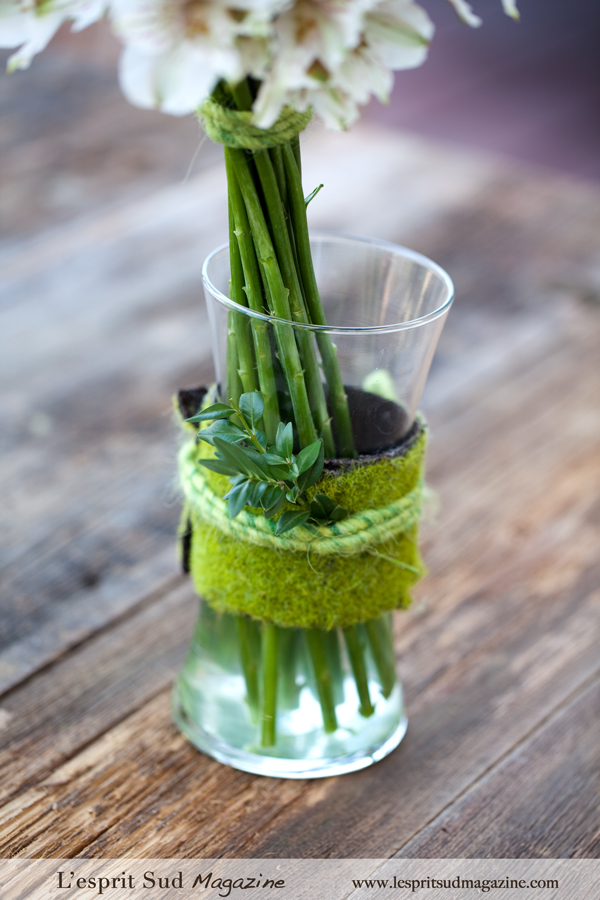
The first design is a low, compact round design arranged in a clear vase. I like to conceal the low clear vase with 2 leaves of green tee. The second one is done in a taller vase for a more dramatic effect. To facilitate the execution of the design, I usually create a grid with 6 pieces of clear floral tape, which then create 9 areas for the stems insertion.

{Materials}
1 low or tall vase
12 - 18 Akito roses
1 bunch white wax
1 bunch Princess Pine
2 green tee leaves* {optional - to conceal the low vase}
Raffia


Elegant Holiday Design Elegant Holiday Design Elegant Holiday Design

Monday, December 24, 2012

{Joyeux Noel .... Merry Christmas .... Merii Kurisumasu}

Joyeux Noel .... Merry Christmas .... Merii Kurisumasu

I wish you all a wonderful Chritsmas

Sunday, December 23, 2012

Chocolate Almond Rochers

Chocolate almond rochers

For the holidays, I decided to bake some sweet treats that I recently learned during a Black Market Bakery's candies workshop. Earlier this week, I posted about the best homemade sticky buns, a recipe that I also learned during a workshop there. Today, it is a much more simple recipe: Chocolate Almond Rochers. They are delicious and can be stored for a couple of weeks in a airtight container. So it is a very good option to mail as a gift. {... and it is what I did}

I decided to do 2 different batches: one with semi-sweet chocolate, and an another one with milk chocolate. It is very important to choose a very high quality chocolate, or the rochers will not taste that good. If I was in France, I would be using Puyricard chocolate. Being here in California, I chose the brand Guittard.

Tempering the chocolate is another important factor for the final look of the rocher {but not its taste}. Indeed, to achieve the desired high gloss and hard brittle texture, tempering the chocolate is required. Being curious in nature, I decided to make the test by preparing an additional 2 batches without tempering the chocolate ... the different was stunning. Tempering is not difficult, but requires precision {a.k.a. a good candy thermometer} and patience.

Chocolate almond rochers Chocolate almond rochers Vintage roses

Chocolate Almond Rochers
(Recipe for 30 rochers - courtesy of Black Market Bakery)

350g silvered almond
350g dark, semi-sweet or milk high quality chocolate
35g egg white
65g powdered sugar

Preparing the rochers
Toss almonds, egg whites and powdered sugar in a bowl, and then spread onto a parchment lined sheet pans. Toast in the oven at 150°C or 300°F. Turn the mixture several times during baking to ensure an even color. Let cool. Toss almonds in a sieve to get rid of the finest particles. Use the largest pieces only.

Temper the chocolate and have it ready. Combine 1/2 of the chocolate with 1/2 of the toasted almonds, and toss together. Working quickly spoon out little mounds onto parchment paper, the size of a truffle. Repeat the procedure until all the mixture is used. Make sure that the mounds are not flat but high.


Tempering chocolate - Melt, cool and rewarm
Melt 2/3 of the chocolate you are working with. The other 1/3 will stay in a large block {the seed}. Melt the chocolate over a barely simmering pot of water. Use smaller chunks which melt more evenly. Stir often to distribute the heat. The melted chocolate needs to reach 48°C or 118° F to melt all the fat crystals. Take the chocolate off the heat.

Now, put in the large block of unmelted chocolate that is the "seed". Slowly cool the chocolate mass to 27°C or 80°F by stirring gently. The block of chocolate will melt somewhat, but once you get the temperature down to 27°C or 80°F, fish the remainder of the block out.

Now very gently, rewarm the chocolate to approx. 31°C or 88°F over a simmering water bath. If the chocolate gets above 32°C or 90°F, you must start the tempering process again. To check if your chocolate is "in temper", dip a knife into the chocolate and let it sit at room temperature for 5 minutes. The chocolate on the knife should be firm and glossy. If it is not temper properly, it will not set up, look gummy and may have "bloom {gray splotches of cocoa butter}.


Saturday, December 22, 2012

Contemporary Holidays design - {Oriental vibe}

Hurricane design for the Holidays

Inspired by some amazing wide head roses and oriental pine that I found at the market, I have designed a contemporary arrangement with an oriental vibe. I chose to design in the same hurricane I used last year because I simply love the visual effect. Like a mini ecosystem in its own, protected from the the outside world...

This design is rather simple. Insert first a support like a small box in the bottom of the hurricane on which the floral foam will rest. Then fill the bottom with some synthetic snow, making sure the support is covered. Insert the rose stems into the wet orb at a 45 degree angle. Make sure you have a sharp cut, leaving about a 3" stem. Insert the orb inside the hurricane, making sure it is stable on its support. If you need to transport the arrangement, you can either tape the foam to the support before inserting the stems, or insert 2 picks crosswise. Finally, add your winter greenery and ornament if you choose to.

{Materials}
1 tall hurricane / terrarium
1 3" Oasis orb
12 - 15 large open roses
1 small bag of synthetic snow
1 tall holidays green branch
1 holidays ornament* (optional)
* I have spray-painted a glass clear ornament using Design Master products: Antique gold and Cranberry.


Hurricane design for the Holidays Hurricane design for the Holidays

Monday, December 17, 2012

Homemade sticky buns and pineapple jam ... {Resistance is futile}

Homemade sticky buns with Pineapple jam

There is no secret to the fact that I love baking and I love learning even more. Every time I have an opportunity to follow a workshop given by some talented chefs such as at L'institut Gastronomique Riviera, I literally jump on the occasion with a lot of anticipation. I found a great place here in Orange County where I live, which is called Black Market Bakery. The owner Chef Rachel Klemek is a fabulous baker who offers cooking classes when the shop is closed.

So far, I have taken 2 classes, one of them being on danishes and croissants. During the class, I learned that the danish dough is the secret ingredient to the perfect sticky buns. And indeed, it is ... Every single person that tasted that sticky bun recipe told me this is the best they every had ... Off course, a lot of butter always help -)

Laminated dough - Sticky buns Homemade pineapple jam Homemade sticky buns

"Rolling in" the danish dough can be intimidating. But in fact, it is quite an easy process. Off course, taking a class where a chef is making a demo is the best way to go. There are also a lot of videos on Youtube which can greatly inspire you.

Instead of using the traditional {honey - maple - butter} filling, I chose to use a homemade pineapple and vanilla jam. That idea was totally inspired by Tito's Downtown Cafe & Bakery, a really neat bakery in panama City, FL. We always go to Panama City on Labour Day weekend, and this last September, we tried this new bakery and its pineapple sticky buns that was straight out of the oven. A subtle explosion of flavors. I decided I had to tried this at home.

Sticky buns with Pineapple jam Antique silver spoons Ercuis {France} Sticky buns with Pineapple jam Sticky buns with Pineapple jam Antique silver spoons Ercuis {France}
Homemade pineapple jam

Homemade sticky buns with a pineapple jam
(Recipe for 24 servings - You can use 1/3 of the dough and freeze the rest for later use - Recipe courtesy of Black Market Bakery)

Danish dough
300g milk
30g dry yeast (Double for fresh yeast) 7 egg yolks
100g sugar
15g salt
85 soft unsalted butter
750g bread flour

450g cold unsalted butter
50g all purpose flour

Filling and finishing
50g Sugar
5g Cinnamon
Heavy cream


Preparing the Danish dough
Pour the milk, yeast and egg yolk into the stand mixer with a dough hook attachment, If making by hand, pour these items into a large bowl. Next add the bread flour, sugar, salt and soft butter.

Turn the mixer on low speed {or knead by hand} and mix the dough until it starts to come together. At this point you may turn the mixer up to medium low and continue to "knead " the dough until it starts to become smooth and elastic. If the dough is over mixed at this point, the gluten may be too tight to fold butter in. Set the dough aside on a floured sheet pan, cover with plastic, and let it rest.


Preparing the "Roll in"
Use the same mixer bowl {now fitted with the paddle attachmentc. Put the cold water and the flour {The last 2 ingredients} into the bowl. Mix on medium high speed until the butter absorbs all the flour and has no lumps. Do no let the butter get warm.

Roll the butter to a 1" thick rectangle, Use lots of flour when rolling the butter so it doesn't stick to the table. You can always dust the flour off later. {You also have the option to roll it inside two wax papers.}

If the butter seems warm, place it on a sheet pan & let it chill in the refrigerator for 30 minutes.

Once the butter and dough are ready {They should both be cool, firm and pliable}, roll the dough to 1/2 sheet pan size. The butter should be half the size of the dough.

Place the butter onto half of the dough. Dust the extra flour and fold the dough over the butter. Seal the edges by smashing them down {This is the "Lock in"} then turn 90 degrees and roll 3X the size. Mentally divide the dough into thirds. Now fold one third over the center third. Fold the other third over the center two. Third is the first fold.

Danish dough - Sticky buns

Poke one finger into the dough, cover and set aside in the refrigerator for 15-20 minutes.

Pull the dough out, turn the dough 90 degrees so the folded edges are at the top and bottom. Roll again to 3X and do the 3 fold again. Poke two fingers into the edge of the dough. Cover and chill for 15 minutes.

Finally pull the dough out, rotate it 90 degrees and do the last fold. At this point the dough should be wrapped well and placed in the freezer for at least 1 hour. Transfer the dough from the freezer to the refrigerator before using. {I like to leave the dough overnight in the freezer then let it thaw out in the fridge the next morning}.

Preparing the sticky buns
Spread the pineapple jam in a pie dish. Combine sugar and cinnamon in a small bowl. On a lightly floured work surface, roll the danish dough to rectangles. Sprinkle with sugar and cinnamon and roll the dough into a tight log. Cut small segments and place them in the pie dish. It doesn't matter if the segments are not all equal in size. I like my sticky buns to look "Home-made" ... imperfect in look! Leave enough space between them since the dough will be proofing. Cover with a plastic wrap and let proof for a couple of hour {or more, until they double in size}.

When ready to bake, preheat the oven to 375°F - 190°C. Brush the buns with heavy cream and bake for 35 - 40 minutes or until golden.

Homemade pineapple jam Sticky buns with Pineapple jam


Pineapple jam
(Yield 750ml)

1.5 kg finely chopped peeled cored fresh pineapple
400g sugar
1 small lemon
175ml water
1 Vanilla bean


In a large, deep stainless steel saucepan, combined pineapple, lemon and water. Bring to a boil over medium heat, stirring constantly to dissolve sugar. Boil, stirring frequently, until mixture thickens, about 15 minutes. Remove from heat and skim off foam.

The jam is ready to be used at this point. You can keep it in the fridge for 2 weeks, or process them in a water bath for 15 minutes in safe & clean preserve jars.
{For more info on preserving, I recommend the Complete Book of Home Preserving from Ball}.


Homemade pineapple jam


Tuesday, December 11, 2012

Organic holidays design ideas

Organic holidays design

With the holidays just around the corner, I have been inspired to create some easy and organic designs with flowers that caught my attention at the market. I went for a green and organic theme, wrapping my containers with light green felt and wool.

The flowers I bought were, a bunch of white alstroemerias completely striped and hand-tied in a bouquet, a dozen of sweet Avalanche roses, some green hypericum to add a holidays accent, as well as amaryllis in stems and in bulb. I also found a nice green wreath made of boxwood.

Organic holidays design Organic holidays design Organic holidays design

To keep the theme going, I stayed within the same color palette {White and Green}, and cover all the containers with the same material. This allowed me to use different types of flowers but still have coherence in my design. All these designs could be organized on the same buffet or dinning table without any problem.

Organic holidays design Roses in a bucket - French flowers market Organic holidays design Organic holidays design

A simple wreath can become a gorgeous centerpiece on a large piece of furniture, simply by adding a tall glass hurricane.

Organic holidays design Organic holidays design Organic holidays design

I love mixing cut amaryllis with amaryllis in pot, which add interestedness to the overall design. You can also put the bulb in a specially designed vase and have the roots growing in water. As a general rule of design, odd numbers is more attractive that even numbers, that's why I chose 3 stems of amaryllis.


Organic holidays design

Wednesday, December 5, 2012

Nature's Wisdom

Nature's Wisdom{You are never given a dream without also being given the power to make it true}
 Richard Bach