
There is no secret to the fact that I love baking and I love learning even more. Every time I have an opportunity to follow a workshop given by some talented chefs such as at L'institut Gastronomique Riviera, I literally jump on the occasion with a lot of anticipation. I found a great place here in Orange County where I live, which is called Black Market Bakery. The owner Chef Rachel Klemek is a fabulous baker who offers cooking classes when the shop is closed.
So far, I have taken 2 classes, one of them being on danishes and croissants. During the class, I learned that the danish dough is the secret ingredient to the perfect sticky buns. And indeed, it is ... Every single person that tasted that sticky bun recipe told me this is the best they every had ... Off course, a lot of butter always help -)


"Rolling in" the danish dough can be intimidating. But in fact, it is quite an easy process. Off course, taking a class where a chef is making a demo is the best way to go. There are also a lot of videos on Youtube which can greatly inspire you.
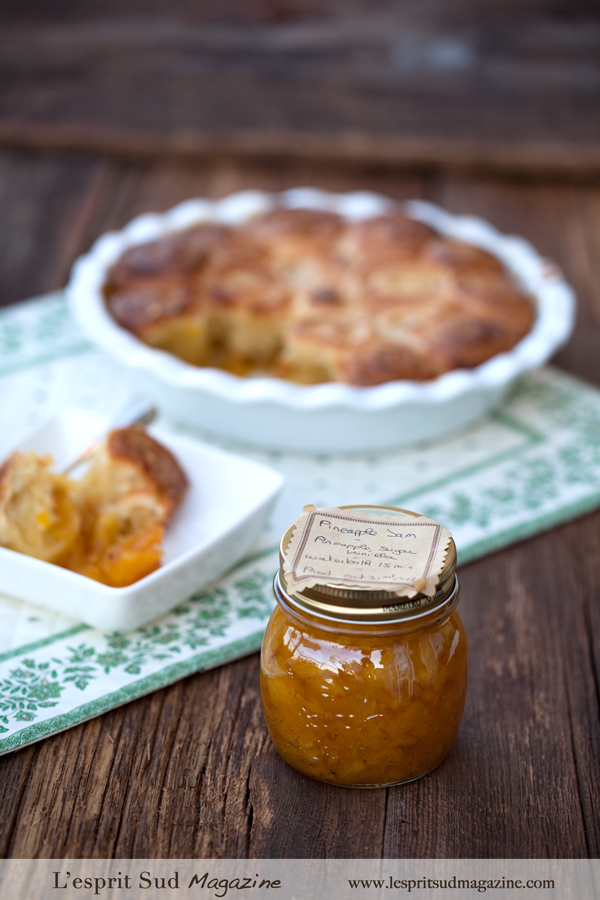
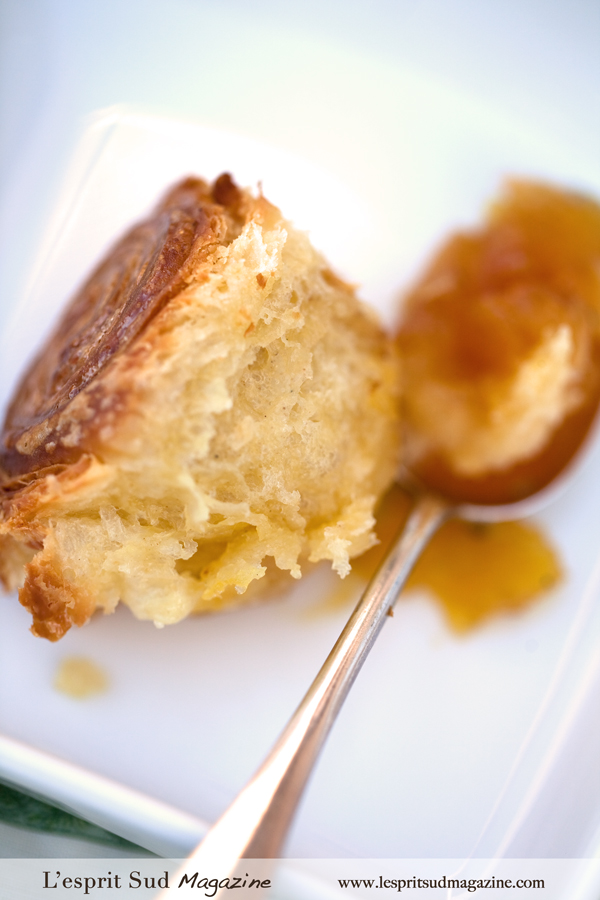
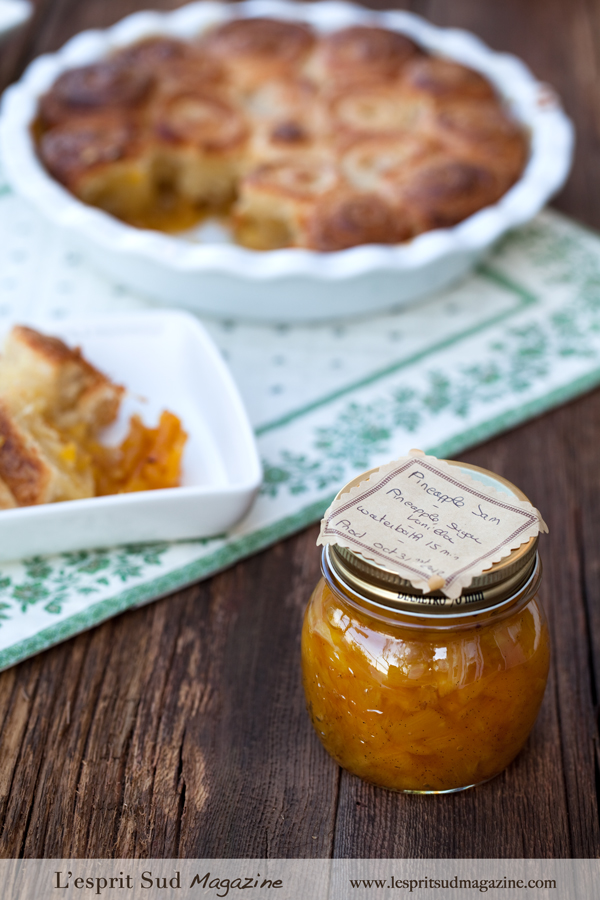
Instead of using the traditional {honey - maple - butter} filling, I chose to use a homemade pineapple and vanilla jam. That idea was totally inspired by Tito's Downtown Cafe & Bakery, a really neat bakery in panama City, FL. We always go to Panama City on Labour Day weekend, and this last September, we tried this new bakery and its pineapple sticky buns that was straight out of the oven. A subtle explosion of flavors. I decided I had to tried this at home.
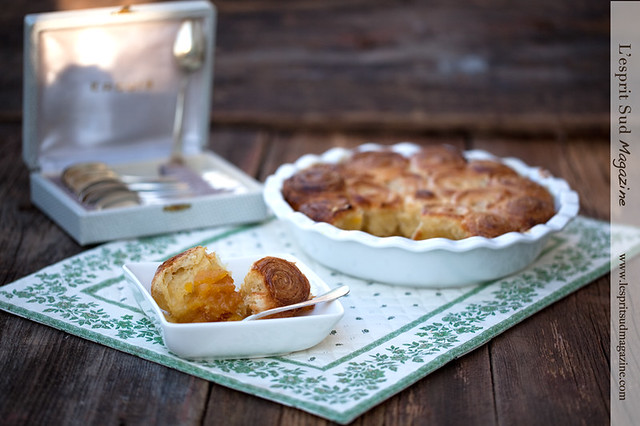
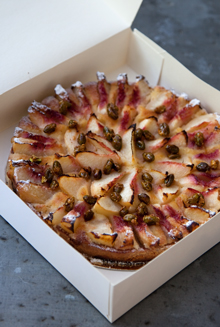
Homemade sticky buns with a pineapple jam
(Recipe for 24 servings - You can use 1/3 of the dough and freeze the rest for later use - Recipe courtesy of Black Market Bakery)
Danish dough
300g milk
30g dry yeast (Double for fresh yeast) 7 egg yolks 100g sugar 15g salt 85 soft unsalted butter 750g bread flour
450g cold unsalted butter
50g all purpose flour
Filling and finishing
50g Sugar
5g Cinnamon
Heavy cream

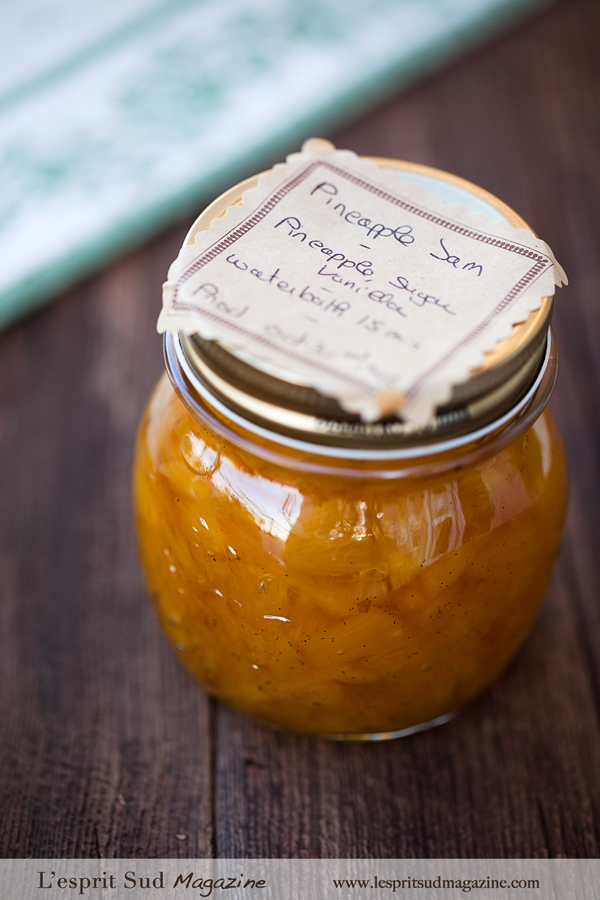
Pineapple jam
(Yield 750ml)
1.5 kg finely chopped peeled cored fresh pineapple
400g sugar
1 small lemon
175ml water
1 Vanilla bean
So far, I have taken 2 classes, one of them being on danishes and croissants. During the class, I learned that the danish dough is the secret ingredient to the perfect sticky buns. And indeed, it is ... Every single person that tasted that sticky bun recipe told me this is the best they every had ... Off course, a lot of butter always help -)
"Rolling in" the danish dough can be intimidating. But in fact, it is quite an easy process. Off course, taking a class where a chef is making a demo is the best way to go. There are also a lot of videos on Youtube which can greatly inspire you.
Instead of using the traditional {honey - maple - butter} filling, I chose to use a homemade pineapple and vanilla jam. That idea was totally inspired by Tito's Downtown Cafe & Bakery, a really neat bakery in panama City, FL. We always go to Panama City on Labour Day weekend, and this last September, we tried this new bakery and its pineapple sticky buns that was straight out of the oven. A subtle explosion of flavors. I decided I had to tried this at home.
Homemade sticky buns with a pineapple jam
(Recipe for 24 servings - You can use 1/3 of the dough and freeze the rest for later use - Recipe courtesy of Black Market Bakery)
Danish dough
300g milk
30g dry yeast (Double for fresh yeast) 7 egg yolks 100g sugar 15g salt 85 soft unsalted butter 750g bread flour
450g cold unsalted butter
50g all purpose flour
Filling and finishing
50g Sugar
5g Cinnamon
Heavy cream
Preparing the Danish dough
Pour the milk, yeast and egg yolk into the stand mixer with a dough hook attachment, If making by hand, pour these items into a large bowl. Next add the bread flour, sugar, salt and soft butter.
Turn the mixer on low speed {or knead by hand} and mix the dough until it starts to come together. At this point you may turn the mixer up to medium low and continue to "knead " the dough until it starts to become smooth and elastic. If the dough is over mixed at this point, the gluten may be too tight to fold butter in. Set the dough aside on a floured sheet pan, cover with plastic, and let it rest.
Preparing the "Roll in"
Use the same mixer bowl {now fitted with the paddle attachmentc. Put the cold water and the flour {The last 2 ingredients} into the bowl. Mix on medium high speed until the butter absorbs all the flour and has no lumps. Do no let the butter get warm.
Roll the butter to a 1" thick rectangle, Use lots of flour when rolling the butter so it doesn't stick to the table. You can always dust the flour off later. {You also have the option to roll it inside two wax papers.}
If the butter seems warm, place it on a sheet pan & let it chill in the refrigerator for 30 minutes.
Once the butter and dough are ready {They should both be cool, firm and pliable}, roll the dough to 1/2 sheet pan size. The butter should be half the size of the dough.
Place the butter onto half of the dough. Dust the extra flour and fold the dough over the butter. Seal the edges by smashing them down {This is the "Lock in"} then turn 90 degrees and roll 3X the size. Mentally divide the dough into thirds. Now fold one third over the center third. Fold the other third over the center two. Third is the first fold.
Poke one finger into the dough, cover and set aside in the refrigerator for 15-20 minutes.
Pull the dough out, turn the dough 90 degrees so the folded edges are at the top and bottom. Roll again to 3X and do the 3 fold again. Poke two fingers into the edge of the dough. Cover and chill for 15 minutes.
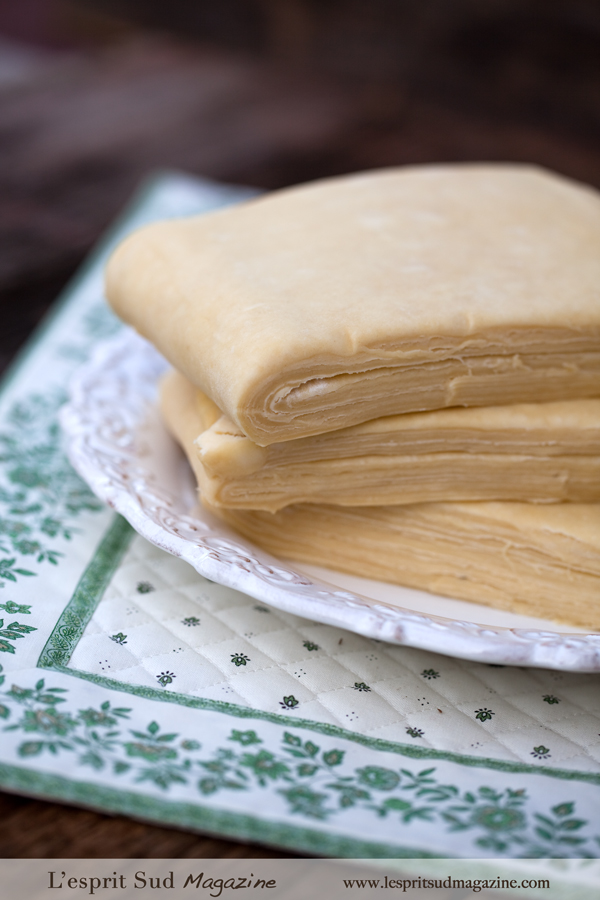
Finally pull the dough out, rotate it 90 degrees and do the last fold. At this point the dough should be wrapped well and placed in the freezer for at least 1 hour. Transfer the dough from the freezer to the refrigerator before using. {I like to leave the dough overnight in the freezer then let it thaw out in the fridge the next morning}.
When ready to bake, preheat the oven to 375°F - 190°C. Brush the buns with heavy cream and bake for 35 - 40 minutes or until golden.
Turn the mixer on low speed {or knead by hand} and mix the dough until it starts to come together. At this point you may turn the mixer up to medium low and continue to "knead " the dough until it starts to become smooth and elastic. If the dough is over mixed at this point, the gluten may be too tight to fold butter in. Set the dough aside on a floured sheet pan, cover with plastic, and let it rest.
Preparing the "Roll in"
Use the same mixer bowl {now fitted with the paddle attachmentc. Put the cold water and the flour {The last 2 ingredients} into the bowl. Mix on medium high speed until the butter absorbs all the flour and has no lumps. Do no let the butter get warm.
Roll the butter to a 1" thick rectangle, Use lots of flour when rolling the butter so it doesn't stick to the table. You can always dust the flour off later. {You also have the option to roll it inside two wax papers.}
If the butter seems warm, place it on a sheet pan & let it chill in the refrigerator for 30 minutes.
Once the butter and dough are ready {They should both be cool, firm and pliable}, roll the dough to 1/2 sheet pan size. The butter should be half the size of the dough.
Place the butter onto half of the dough. Dust the extra flour and fold the dough over the butter. Seal the edges by smashing them down {This is the "Lock in"} then turn 90 degrees and roll 3X the size. Mentally divide the dough into thirds. Now fold one third over the center third. Fold the other third over the center two. Third is the first fold.
Poke one finger into the dough, cover and set aside in the refrigerator for 15-20 minutes.
Pull the dough out, turn the dough 90 degrees so the folded edges are at the top and bottom. Roll again to 3X and do the 3 fold again. Poke two fingers into the edge of the dough. Cover and chill for 15 minutes.
Finally pull the dough out, rotate it 90 degrees and do the last fold. At this point the dough should be wrapped well and placed in the freezer for at least 1 hour. Transfer the dough from the freezer to the refrigerator before using. {I like to leave the dough overnight in the freezer then let it thaw out in the fridge the next morning}.
Preparing the sticky buns
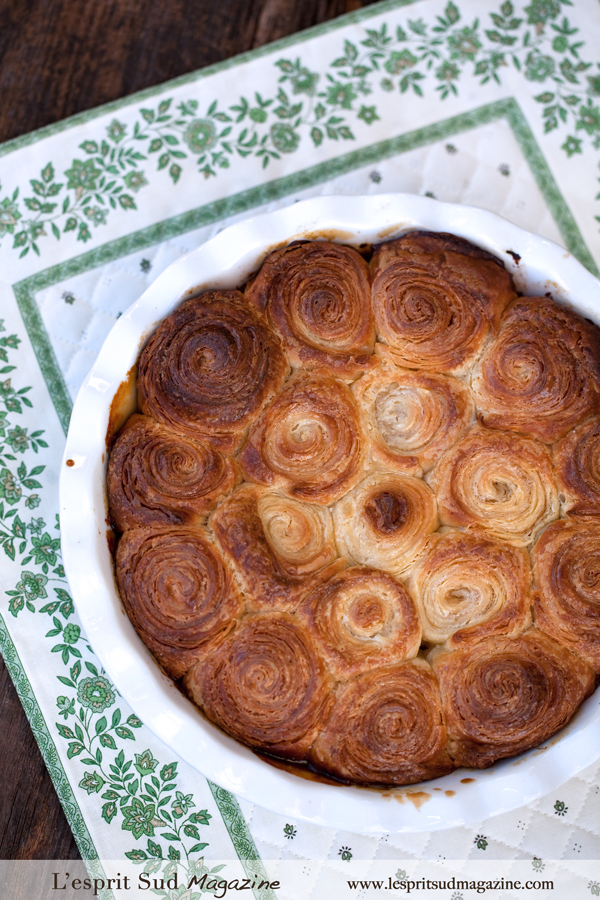
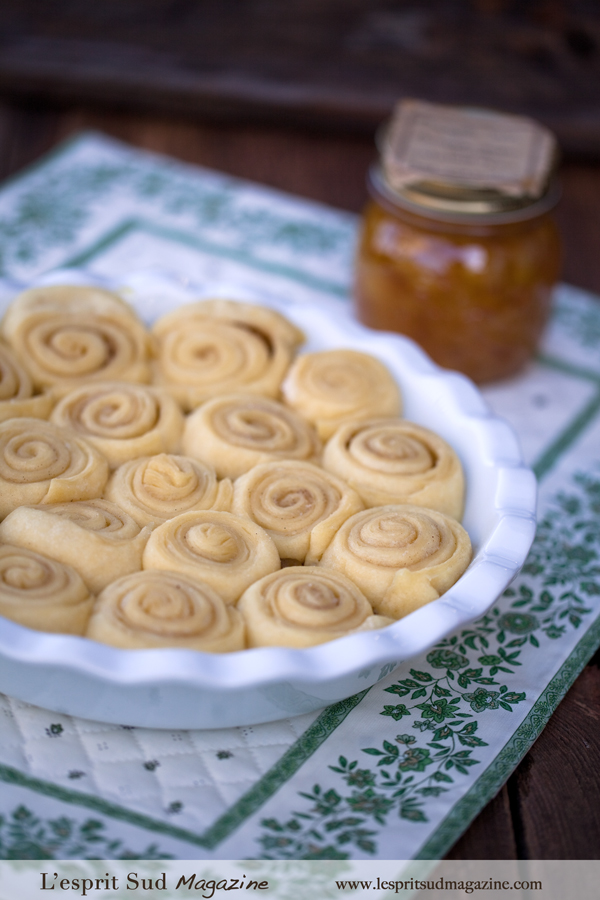
Spread the pineapple jam in a pie dish. Combine sugar and cinnamon in a small bowl. On a lightly floured work surface, roll the danish dough to rectangles. Sprinkle with sugar and cinnamon and roll the dough into a tight log. Cut small segments and place them in the pie dish. It doesn't matter if the segments are not all equal in size. I like my sticky buns to look "Home-made" ... imperfect in look! Leave enough space between them since the dough will be proofing. Cover with a plastic wrap and let proof for a couple of hour {or more, until they double in size}.
When ready to bake, preheat the oven to 375°F - 190°C. Brush the buns with heavy cream and bake for 35 - 40 minutes or until golden.
Pineapple jam
(Yield 750ml)
1.5 kg finely chopped peeled cored fresh pineapple
400g sugar
1 small lemon
175ml water
1 Vanilla bean
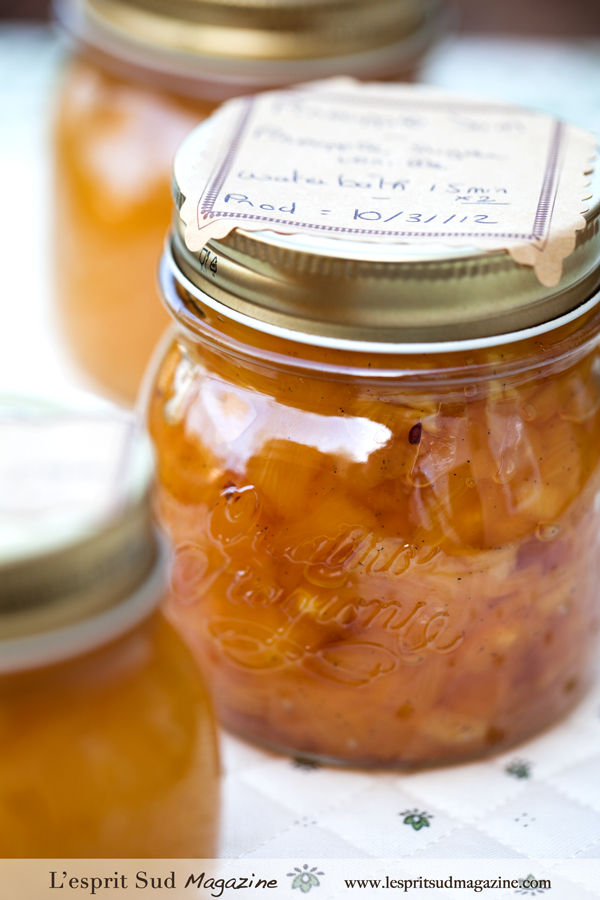
In a large, deep stainless steel saucepan, combined pineapple, lemon and water. Bring to a boil over medium heat, stirring constantly to dissolve sugar. Boil, stirring frequently, until mixture thickens, about 15 minutes. Remove from heat and skim off foam.
The jam is ready to be used at this point. You can keep it in the fridge for 2 weeks, or process them in a water bath for 15 minutes in safe & clean preserve jars.
{For more info on preserving, I recommend the Complete Book of Home Preserving from Ball}.
The jam is ready to be used at this point. You can keep it in the fridge for 2 weeks, or process them in a water bath for 15 minutes in safe & clean preserve jars.
{For more info on preserving, I recommend the Complete Book of Home Preserving from Ball}.


No comments:
Post a Comment
Thank you for stopping by. I will be very happy to read your comments and questions.
Sandra