Thursday, May 20, 2010

Divine lemon meringue pie with a strawberry sauce

Divine lemon pie and Strawberry sauce

At this time of the year, citrus are in their peak season. Although it is quite easy to find lemons all year long thanks to our global economy, nothing beats the quality of fruits in season. If you have the chance to have access to lemon or orange trees, you will definitely agree with that statement. The golden fruit is highly regarded in the South of France. Every year, there is the famous Fête du Citron (Lemon festival) in Menton. This year, the event is taking place from Feb 12th to March 3rd and includes a large citrus exhibition as well as a multicolor parade every Sunday morning. (For more information and pictures, please consult the official website.)

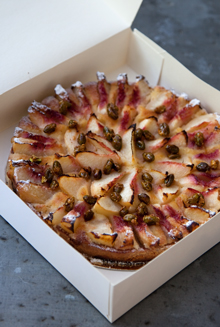
To celebrate the lemon season, we are happy to feature a divine lemon pie with a strawberry sauce. This lemon pie requires a little bit of work as the pastry needs to be blind baked. However, if you do take the time you will be amazed with the result. The lemon pie can be prepared in a large baking pan for non formal event or in a smaller format.

Divine Lemon pie with a strawberry sauce
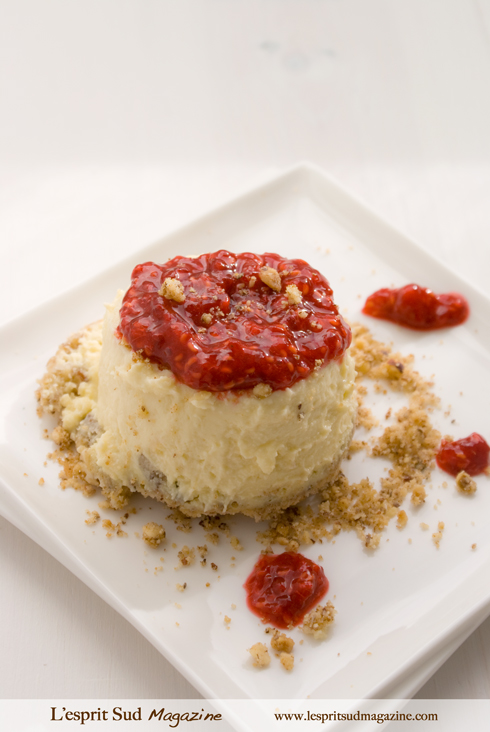
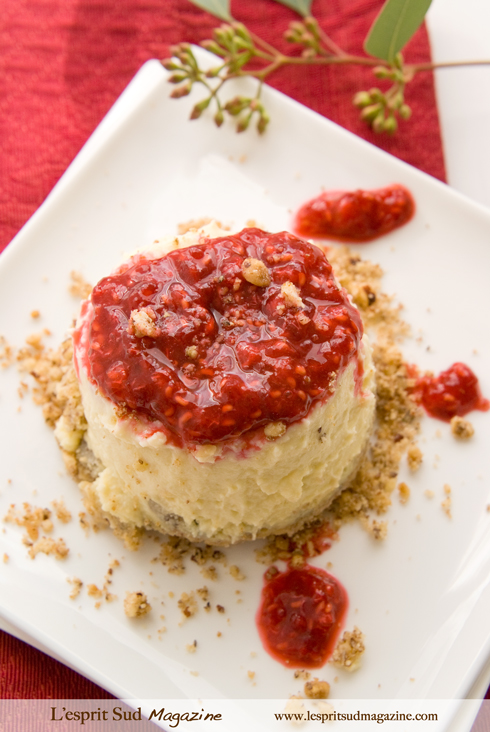
The lemon pie is delicious when served with a raspberry sauce but can also be enjoyed "plain".

Lemon pie and Strawberry sauce

Divine Lemon pie with a strawberry sauce
(Recipe for 6-8 servings)

Pastry (Pâte sablée)
2 1/3 cup (300g) of flour
2/3 cup (150g) of butter, soften
1 egg yolk
2/3 cup (125g) of sugar
¼ cup (60g) of heavy cream
1 tsp of vanilla extract


Lemon custard
2 organic lemons
2/3 cup (150g) of heavy cream
4 eggs
1 cup (200g) of granulated sugar


Meringue
3 egg whites
1/4 cup (30g) of powdered sugar


Strawberry sauce
12 oz (300g) of Strawberries, fresh or frozen
½ cup sugar
2 tbsp of lemon juice
1 tsp of grated lemon rind


Preparing and blind baking the pastry
In a mixing bowl, process the butter and sugar until the mixture becomes light. Add the flour, then the egg. Finally, add the cream and vanilla extract. Do not overwork the dough. Let it rest in the fridge for 1 hour.

Roll the pastry dough to fit a 10” (26cm) pie tin. Roll the pastry out between 2 sheets of non-stick baking paper, rolling from center out and turning it to ensure even rolling. Peel off one sheet of baking paper and line the pie tin pastry-side down. Pell off the remaining piece of paper and gently lift and tuck the pastry, trying not to stretch it, into the tin. Trim the edges. Place in the freezer for 30 minutes.

Blind baking is a technique where the pastry shell is partially baked without the filling. Line the base with non-stick baking paper and fill with uncooked rice or dried beans and bake for 20 - 25 minutes at 350˚F (180˚C) or until golden. Remove the baking paper and weight.

Preparing the lemon custard
Finely grate the lemon zest and extract the juice of the 2 lemons. In a mixing bowl, whisk the 4 eggs with the sugar until well blended. In a separate bowl, mix the heavy cream for 10 seconds. (Do not overwork). Add the lemon zest and juice to the egg mixture then finally, incorporate the heavy cream. Place in the fridge until ready to use.

When the blind baking is done, incorporate the lemon custard and bring it back to the oven for 1 hour and 15 minutes at 300˚F (150˚C).

Preparing the meringue
In a mixing bowl, beat the egg whites at medium speed until soft peaks forms. Add the powdered sugar and raise the speed to high, and beat until peaks are stiff and glossy. Top the pie with the meringue 5 minutes before the end of the cooking time.

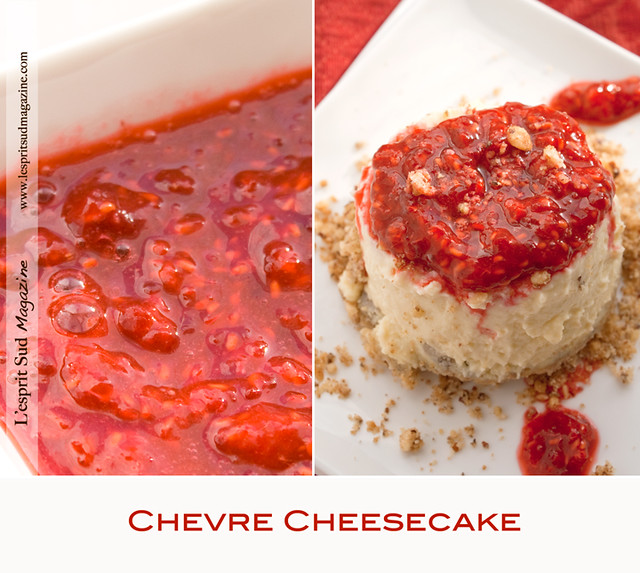
Preparing the strawberry sauce
In the bowl of a food processor, place the strawberries, sugar, lemon juice and zest. Blend until pureed. Refrigerated until ready to serve.

Presenting the pie
Cut a slice of the pie and drop 1 tbsp of raspberry sauce over it.


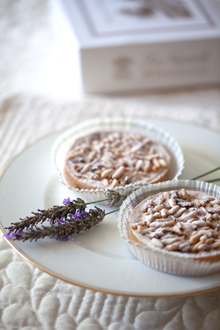
Notes: You can also prepare individual mini pies. The blind baking time as well as the cooking time will have to be adjusted to 15 – 20 minutes.

Divine lemon pie and Strawberry sauce


Thursday, May 13, 2010

Crispy potato pancakes with duck prosciutto and horseradish cream

Crispy potato pancake with duck prosciutto and horseradish cream

Finger foods are always fun to experiment with. You can practically take any dish you like, and prepare it in a bite size version which is so convenient when entertaining. One thing that also makes finger foods so pleasant to serve is the "hunt" for the special vessel that will make the delectable bite so compelling, provided of course that you are not allergic to shopping.

The featured recipe is a crispy potato pancake that we have topped with horseradish cream and also with a more exotic finding: duck prosciutto. Duck prosciutto is a magret duck breast that has been cured for weeks, the same way as traditional prosciutto is, and is usually available in fine grocery boutique. If you can't find it, your option is to replace the duck prosciutto with Parma or Serrano ham, or even if your budget allows it, with the incomparable Jamón ibérico (aka pata negra).

We are using a horseradish cream to give a little kick to the bite. If however, you prefer a milder version, you can omit the horseradish and even replace the sour cream with whipped cream which will create a lighter composition.

Kitchen decor

Crispy potato pancake with duck prosciutto and horseradish cream

Crispy potato pancakes with duck prosciutto & horseradish cream
(This is recipe is for 12 mini pancakes)

2/3 cup (300g) of starchy potatoes, peeled
2 1/2 tbsp (40g) of butter, melted
1 egg
sea salt and cracked black pepper
1 tbsp of horseradish cream
½ cup of chive, minced
12 slices of duck prosciutto

Preheat the oven to 390°F (200°C).

Finely shred the potato. Place in a large bowl with the egg, butter, salt and pepper and mix well to combine. Drain off any excess liquid. Press tablespoonfuls of the mixture into the base of 12 lightly greased ½ cup-capacity (125ml) muffin tins and bake for 25 minutes or until golden. Cool on a paper towel to absorb the excess butter.

Place the sour cream and horseradish in a bowl and mix until well combined. Spoon onto the potato pancakes and top with duck prosciutto and chives to serve.

Note
This recipe was adapted from an original recipe published in the always formidable Donna Hay (Issue 46).

Crispy potato pancake with duck prosciutto and horseradish cream

Monday, May 10, 2010

Birthday cake: make it with flowers!

Birthday flower cake

Flowers are quite versatile in terms of usage. Outside the traditional vase design, there are plenty of options that will allow you to practice your creative skills. A birthday cake made of fresh flowers is a fun project to make and will for sure, be greatly appreciated by anyone who receives it as a gift. You may not be able to eat it but rest assured, a floral cake is a real treat for the eye and the soul.

The featured design in this article, is lovely birthday floral cake in pastel tones. Depending on the event, you can easily change the “look” of this cake by using different colors. Although kermit poms only come in green, standard carnations and spray roses are available all year long in many different color and shade. 

This floral arrangement is really easy to make and only requires 4 types of flowers that are widely available. So next time you have a birthday celebration, why not surprise your family and friends with this gorgeous flower cake?


Flower cake
Carnations create a frosting-like texture on the side of the cake

Birthday flower cake
Playing with the stems height creates an interesting depth

Cymbidium Orchid
The cymbidium orchid adds a touch of elegance to the design

Flower cake


Birthday Flower Cake

½ Oasis foam
25 pink carnations
10 stems of green kermit poms
3 stems of yellow spray roses
1 cymbidium orchid


Soak your Oasis and shape it to make it round. The top of a 1-pint ice cream container can help you to perfectly shape your Oasis.

Starting at the bottom, create two concentric rows with the carnations. Each row will require approximately 10 carnations. Cut each stem about 3” long and make sure to “fluff” the carnation head before inserting at least 2” of the stem in the foam. Push the flower head with your fingers around the calyx area to securely place the flower as close as possible to the Oasis. When creating the 2nd row, insert each flower in between the flowers of the 1rst row, to avoid any gaps. 

Now it is time to start working on the top of the cake. Place your cymbidium orchid on one side, and pavé the top with Kermit poms. Create a line, slightly off center with the spray roses, and continue that line on each side of the cake. Place kermit poms of different height on the top part, along the spray rose’s line and around the cymbidium orchid. Finish your cake by placing kermit poms in twos, on the side of the cake to accentuate the movement created by the spray rose’s line. 

Place the birthday floral cake on a cake pedestal. If you are creating this arrangement well before the event, make sure to add some water at the base of your arrangement.


Notes:

1) You can add some candles on your cake
2) Another idea would be to create a Biedermeier design by organizing concentric rows on the top of the cake (ex: 1 row of kermit poms and 1 row of spray roses, with the Cymbidium in the center)
3) A special thanks to Gail Call, AIFD that demonstrated this design in the certificate program she teaches at Golden West College.


Thursday, May 6, 2010

Chèvre cheesecake with its raspberry sauce

Chèvre cheesecake & Raspberry sauce

Cheesecake is a very popular dessert in North America. In the US, the cake is usually made with cream cheese and can be flavored and/or topped with a wide variety of fruits, nuts, and chocolate. In Europe, the type of cheese used will depend on the culinary tradition of the country: Ricotta is the number one baking cheese in Italy while Germany and Poland commonly bake with quark cheese. Although cheesecake is really not part of the French baking repertoire, one easy way to give a french allure to a cheesecake is to use fresh Chèvre cheese.

There was a time when Chèvre was only found in France. Nowadays, the goat cheese is widely available either through importation or even local production. There are plenty of advantages in replacing the traditional cow cheese with a Chèvre cheese. It is more easily digested and also contains a higher content of Vitamins A and B, calcium, potassium and magnesium. Unless you are totally allergic to its tangy flavor, Chèvre cheesecake is a delicious alternative to the traditional one.

The featured recipe uses fresh Chèvre cheese which creates a very subtile taste that also pairs really well with the lemon and raspberry's acidity. We hope you will be curious enough to try this delicious recipe!

Chèvre cheesecake & Raspberry sauce

Mini cheesecake & Raspberry sauce

Chèvre cheesecakes and its raspberry sauce
(This is recipe is for 4 individual cheesecakes)

3/4 cup (100g) of whole almonds or hazelnuts
2 tbsp (30g) of butter, divided
1 1/2 tbsp (15g) of brown sugar
3 tbsp (25g) of flour
8 oz (225g) of Chèvre cheese, softened
1/2 cup (100g) of sugar
2 large eggs
1/2 cup (115g) of sour cream
1 tbsp of fresh lemon zest
1 tsp of vanilla extract

Raspberry sauce
1 cup (250g) of raspberries, fresh or frozen
1/4 cup (50g) of sugar
2 tbsp of orange liqueur (optional)
1 tbsp of fresh lemon juice

Preheat the oven to 350°F (180°C).

In a food processor,combine the whole almonds (or hazelnuts), 1 1/2 tbsp of the butter (reserving the rest for the ramekins), brown sugar, and flour. Process until the nuts are finely chopped. Reserve.

Thickly butter four 6-8 ounce ramekins and set them in a baking dish, 9X9' (24x24cm) or bigger with 2' (5cm) sides. Put a pot of water to boil for making a bain marie in the baking dish.

Wash the food processor and put the Chèvre. Process until smooth. Add the sugar and process until mixed; then add the eggs, sour cream, zest, and vanilla. Process until smooth, scrapping once to get all the Chèvre in the mix.

Pour the batter into the ramekins; then sprinkle the almond (hazelnut) mixture evenly over the tops. Carefully pour hot water into the baking pan, an inch-up the sides of the ramekins. Put the pan in the oven.

Bake for 30-35 minutes, until the cheesecakes don't wiggle too much when jiggled, and the sides are starting to pull away from the ramekins. Take out and cool completely, then chill.

When the cheesecakes are cold, carefully place each one in a bowl of hot water for one minute; then run a pairing knife around the edge. Place a small dessert plate over the ramekin and invert, tapping on the counter to make the cheesecake fall onto the plate.

Raspberry sauce
To make the raspberry sauce, combine the berries, sugar, liqueur and lemon juice in a small saucepan. Bring to a simmer and cook until slightly thickened. Cool and serve over cheese.


Note
The original recipe was published in the "Real Food" magazine (Spring 2009), the publication of the extraordinary Bristol Farm grocery chain.

Chèvre cheesecake & Raspberry sauce